Syntacts Draw Example Project
Introduction
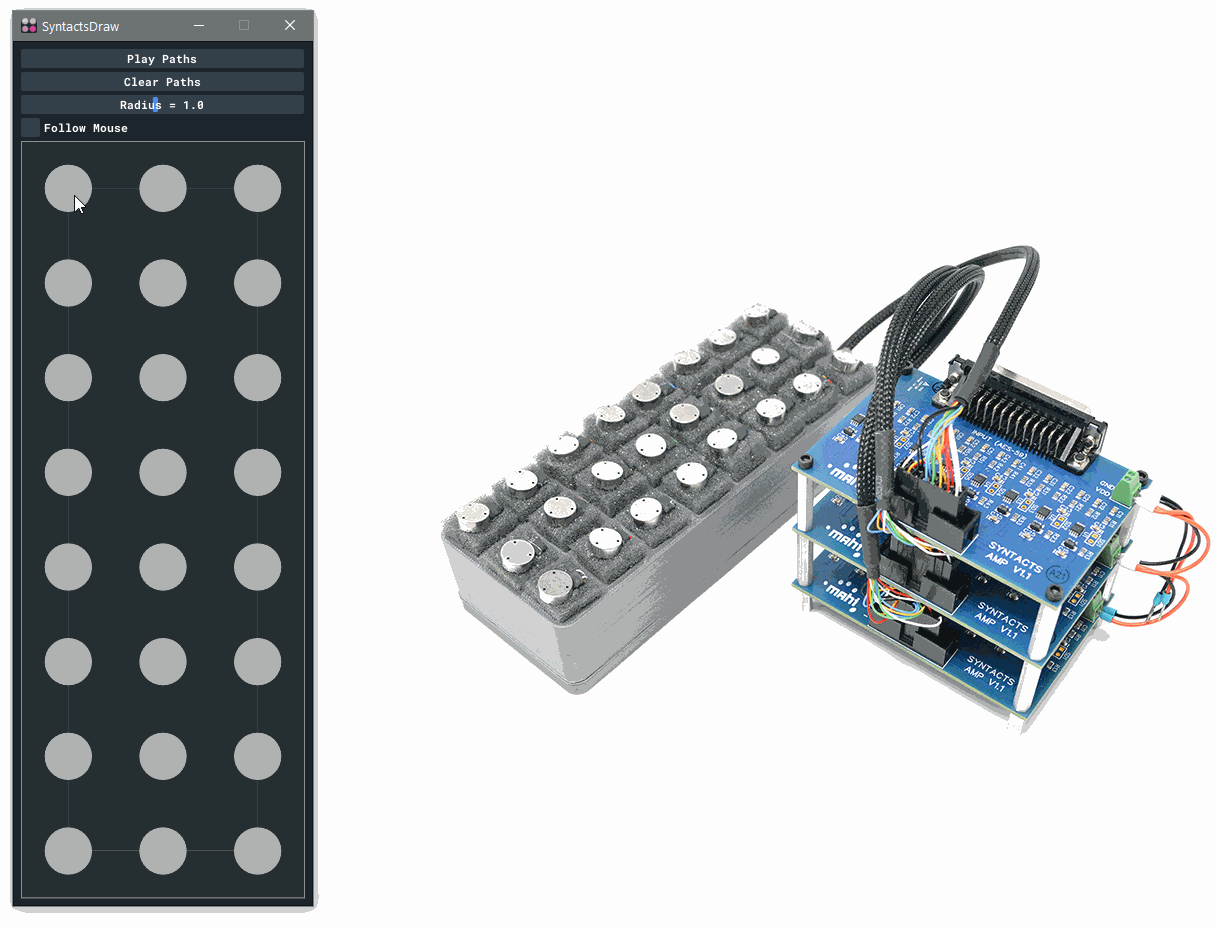
In this tutorial, we will create a GUI interface that allows us to “draw” 2D tactile animations on the 24-tactor Syntacts Array. We will leverage Syntact’s Spatializer to blend the amplitudes of adjacent tactors so that we can create the illusion of continuous motion. The program will be written in C++ using the mahi-gui library. You should already have a decent understanding of C++ and completed the C++ API tutorial. The Syntacts Array is driven by a MOTU 24Ao audio interface. Even if you don’t have a MOTU 24Ao or the Array, this tutorial is still a good example of creating user interfaces around Syntacts. Completed code is available on GitHub.
Requirements
- C++17 compiler
- CMake
- MOTU 24Ao audio interface
- assembled Syntacts Array
- three Syntacts v1.x amplifiers
Setting Up with CMake
We will use CMake as our build system. Our build script, CMakeLists.txt, is given below. Using FetchContent, we can automatically retrieve mahi-gui and Syntacts from their GitHub repositories and build them as a part of our application. Finally, we will make an executable from a source file named draw.cpp, and link it to mahi-gui and Syntacts.
# CMakeLists.txt
cmake_minimum_required(VERSION 3.7)
project(SyntactsDraw VERSION 0.1.0 LANGUAGES CXX)
include(FetchContent)

# fetch mahi-gui
FetchContent_Declare(mahi-gui GIT_REPOSITORY https://github.com/mahilab/mahi-gui.git)
FetchContent_MakeAvailable(mahi-gui)

# fetch syntacts (could also use find_package if installed)
set(SYNTACTS_BUILD_GUI OFF CACHE BOOL "" FORCE)
set(SYNTACTS_BUILD_C_DLL OFF CACHE BOOL "" FORCE)
set(SYNTACTS_BUILD_EXAMPLES OFF CACHE BOOL "" FORCE)
set(SYNTACTS_BUILD_TESTS OFF CACHE BOOL "" FORCE)
FetchContent_Declare(syntacts GIT_REPOSITORY https://github.com/mahilab/Syntacts.git)
FetchContent_MakeAvailable(syntacts)

add_executable(draw draw.cpp)
target_link_libraries(draw mahi::gui syntacts)
Making an Application Window
First, we create our source file draw.cpp in the same directory as CMakeLists.txt. We begin by including all the necessary library headers and using declarations, and defining a few constants:
// draw.cpp
#include <syntacts>
#include <Mahi/Gui.hpp>
#include <Mahi/Util.hpp>

using namespace tact;
using namespace mahi::gui;
using namespace mahi::util;

constexpr int WIDTH  = 300; // window width
constexpr int HEIGHT = 865; // window height

constexpr int COLS   = 3;   // array columns
constexpr int ROWS   = 8;   // array rows
Next, we will create a class SyntactsDraw which subclasses Application from mahi-gui. Application provides us with a window and OpenGL context. You don’t actually need to know anything about OpenGL for this tutorial, because we will be using ImGui to draw our widgets and 2D graphics. ImGui is an incredibly powerful, yet simple “immediate-mode” GUI library for C++ and is excellent for creating quick interfaces. mahi-gui comes pre-integrated with ImGui, so we can use it without any additional setup.
We need to call Application’s constructor from our class’s constructor to establish the window size and name. We will also go ahead and set a theme for ImGui, and disable ImGui Viewports (i.e. multi-window features) since we only need one window.
Next, we override Application’s update method. This function will be called every frame before the window is rendered. It is here that we will put our ImGui window code and application logic. The ImGui window is a separate concept from the application window (i.e. the window created by the operating system). It can be thought of as a window within a window. The ImGui window content starts at ImGui::Begin and ends with ImGui::End. All code in between these two functions will compose our user interface. We will set the window’s position and size so that it exactly matches the Application window size.
/// Syntacts Array Drawing Application
class SyntactsDraw : public Application {
public:
    /// Constructor
    SyntactsDraw() : Application(WIDTH,HEIGHT,"SyntactsDraw",false) {
        // set ImGui theme and disable viewports (multi-window)
        ImGui::StyleColorsMahiDark3();
        ImGui::DisableViewports();
    }
private:
    /// Called once per frame
    void update() override {
        // setup ImGui window
        ImGui::SetNextWindowPos({0,0}, ImGuiCond_Always);
        ImGui::SetNextWindowSize({WIDTH,HEIGHT}, ImGuiCond_Always);
        ImGuiWindowFlags flags = ImGuiWindowFlags_NoMove | ImGuiWindowFlags_NoResize | ImGuiWindowFlags_NoTitleBar;
        ImGui::Begin("Syntacts Draw", nullptr, flags);

        // ALL APPLICATION CODE TO GO HERE

        ImGui::End();
    }
};
Now that we have the skeleton of SyntactsDraw complete, we can create an instance in main and run it:
// main, program entry point
int main(int argc, char const *argv[]) {
    SyntactsDraw app;
    app.run();
    return 0;
}
At this point, we can build the program with CMake. Run the following commands from a shell in the directory that contains CMakeLists.txt and draw.cpp:
mkdir build
cd build
cmake ..
cmake --build . --config Release
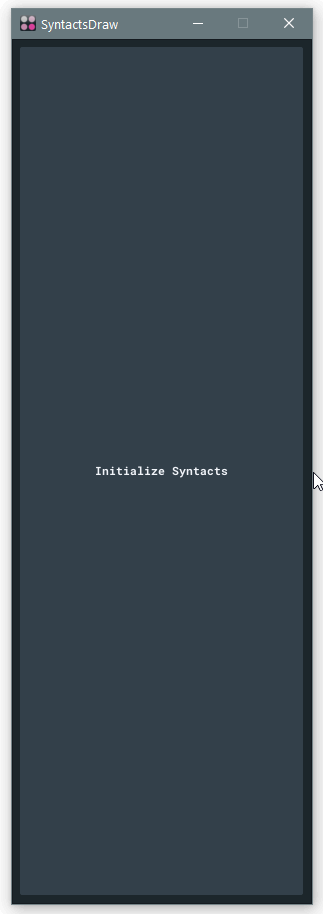
Allow the build process to complete (it may take a minute or two the first time, as mahi-gui and Syntacts are built). If everything goes correctly, you should have an application draw.exe located in the build output. Go ahead and run it. You should see a tall skinny window with nothing in it.
Fleshing Out Our Application
Now let’s add some functionality to our program! First things first, we need to initialize a Syntacts Session and configure a Spatializer. We will add both of these as member variables of our SyntactsDraw class (denoted with m_ prefix). A new member function initialize will configure them and create the Signal that we will play on the array (a simple 175 Hz sine wave):
/// Syntacts Session
Session m_session;
/// Syntacts Spatializer
Spatializer m_spat;
/// Spatializer radius
float m_radius = 1;
/// Syntacts Signal
Signal m_sig;

/// Initializes Syntacts Session and Spatializer
void initialize() {
    if (m_session.open("MOTU Pro Audio", API::ASIO) != SyntactsError_NoError) {
        LOG(Fatal) << "Failed to open MOTU 24Ao! Ensure that the device is connected and that drivers are installed.";
        throw std::runtime_error("Failed to open MOTU 24Ao!");
    }
    m_spat.bind(&m_session);
    m_spat.setTarget(0,0);
    m_spat.setRadius(m_radius);
    for (int c = 0; c < COLS; c++) {
        for (int r = 0; r < ROWS; ++r) {
            int ch = c*ROWS + r;
            m_spat.setPosition(ch,(double)c,(double)r);
        }
    }
    m_sig = Sine(175);
}
Now we can add a button to our GUI code in update that will call the function if the Session is not open yet.
...
ImGui::Begin("Syntacts Draw", nullptr, flags);
// // if Session not open, offer initialization button
if (!m_session.isOpen()) {
    if (ImGui::Button("Initialize Syntacts", ImVec2(-1,-1)))
        initialize();
}
...
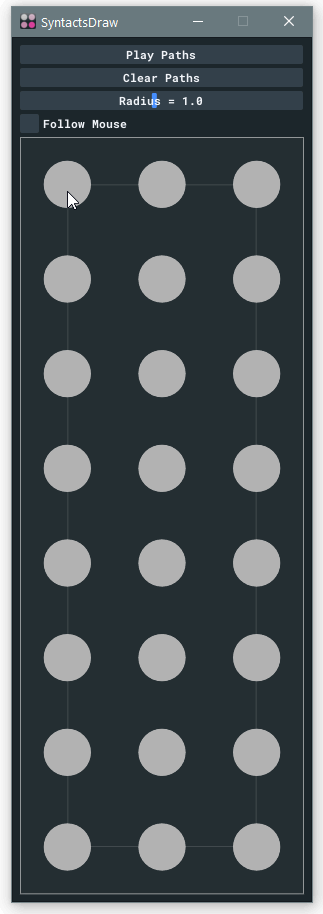
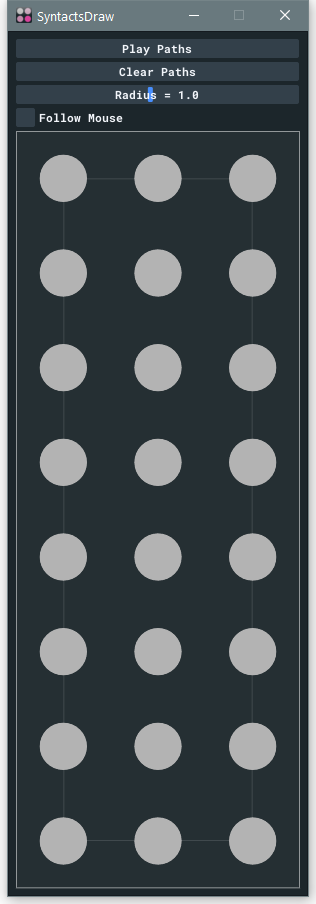
Great! Now let’s get our hands dirty and write a function to draw our array graphics. To help us later on, will create two Rects to store the pixel coordinates of our array – one bounding the outer edge, and one bounding the tactors. Because we want to be fancy, we will use the Session method getLevel to color each tactor circle so that its Hot Pink at max level (i.e 1.0).
/// Pixel rect enclosing outer array
Rect m_arrayRect;
/// Pixel rect enclousing inner array
Rect m_tactorRect;

/// Draws the array background graphics
void drawArray() {
    auto& dl     = *ImGui::GetWindowDrawList();
    Vec2 cp      = ImGui::GetCursorPos();
    Vec2 pad     = ImGui::GetStyle().WindowPadding;
    float w      = WIDTH - pad.x * 2;
    float h      = ROWS * w / COLS;
    float space  = w / COLS;
    float radius = space * 0.25f;
    m_arrayRect  = Rect(cp, Vec2(w,h));
    m_tactorRect = Rect(cp + Vec2(space,space)/2, Vec2(w,h) - Vec2(space,space));
    dl.AddRectFilled(m_arrayRect.tl(), m_arrayRect.br(), IM_COL32(255,255,255,10), 5);
    dl.AddRect(m_arrayRect.tl(), m_arrayRect.br(), IM_COL32(255,255,255,128));
    dl.AddRect(m_tactorRect.tl(), m_tactorRect.br(), IM_COL32(255,255,255, 32));
    for (int c = 0; c < COLS; ++c) {
        for (int r = 0; r < ROWS; ++r) {
            int ch      = c*ROWS + r;
            float x     = cp.x + space / 2 + c * space;
            float y     = cp.y + h - space / 2 - r * space;
            float level = (float)m_session.getLevel(ch);
            Color col   = Tween::Linear(Grays::Gray70, Pinks::HotPink, level);
            dl.AddCircleFilled(Vec2(x,y),radius,ImGui::ColorConvertFloat4ToU32(col),32);
        }
    };
}
We can call this from update, and see the result:
Looking good, but so far we have only created a static background. Let’s add some interactivity. We will offer two modes of user interaction: one where the user can draw a series of paths and play them back on the array, and one where the array target position follows the mouse in realtime.
For the “playback” mode, we will define our paths as a vector of vectors of Vec2s. We will also add a few boolean flags so we know what mode we are in, as well as a variable to store the position of the Spatializer target position in pixels:
/// User's paths
std::vector<std::vector<ImVec2>> m_paths;
/// Are we playing back the user's path?
bool m_playing = false;
/// Is mouse following mode enabled?
bool m_followMode = false;
/// Pixel position of target
Vec2 m_target_px;
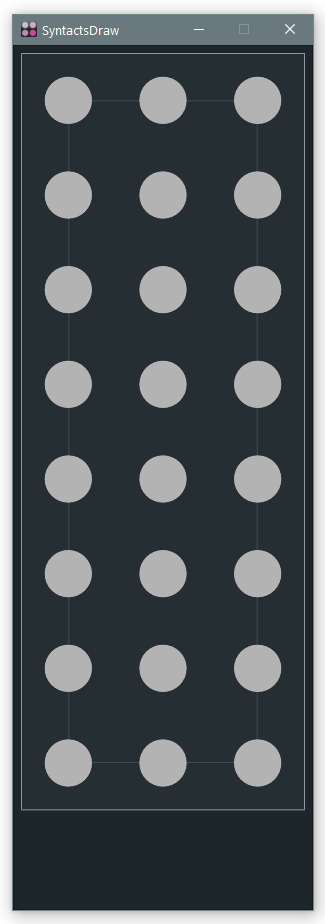
Back in our update method, we can add a few buttons and sliders to 1) play the path, 2) clear the path, 3) modify the target radius, and 4) toggle interaction modes. Additionally, we will allow the user to modify the target radius with mouse wheel scroll.
Our Play button will start a coroutine that plays back the user’s current set of paths (more on that later). The Clear button simply clears the vector of paths. Our Radius slider will modify the value of m_radius, and use it to update the target radius of m_spat. Similarly, we update the target radius if the mouse wheel value this frame is not zero. When the Follow Mouse checkbox is toggled, we will play or stop our Signal on the Spatializer.
...
if (!m_session.isOpen()) {
    if (ImGui::Button("Initialize Syntacts", ImVec2(-1,-1)))
        initialize();
}
else {
    // controls to play and clear path
    ImGui::BeginDisabled(m_followMode);
    if (ImGui::Button("Play Paths", ImVec2(-1,0)) && !m_playing)
        start_coroutine(playPaths());
    if (ImGui::Button("Clear Paths", ImVec2(-1,0)))
        m_paths.clear();
    ImGui::EndDisabled();
    // spatializer radius control via slide and mouse scroll
    ImGui::SetNextItemWidth(-1);
    if (ImGui::SliderFloat("##Radius",&m_radius, 0.1f, 2.0f, "Radius = %.1f"))
        m_spat.setRadius(m_radius);
    float scroll = ImGui::GetIO().MouseWheel;
    if (scroll != 0) {
        m_radius += scroll * 0.1f;
        m_radius = clamp(m_radius, 0.1f, 2.0f);
        m_spat.setRadius(m_radius);
    }
    // follow mode (i.e. target = mouse pos)
    if (ImGui::Checkbox("Follow Mouse",&m_followMode)) {
        if (m_followMode)
            m_spat.play(m_sig);
        else
            m_spat.stop();
    }
    // get current mouse pos
    Vec2 mouse = ImGui::GetMousePos();
    // draw array graphics
    drawArray();
    ...
}
Now, we need to appropriately update the Spatializer target position. Let’s first handle the “playback” mode. We need to collect users’ input as they draw the path on the array, and render the drawn paths:
    ...
    // playback mode, allow user to draw paths
    if (!m_followMode) {
        if (m_arrayRect.contains(mouse) && !m_playing) {
            if (ImGui::IsMouseClicked(0))
                m_paths.emplace_back();
            if (ImGui::IsMouseDown(0))
                m_paths.back().push_back(mouse);
        }
        drawPaths(Oranges::Orange, 5);
    }
    ...
/// Draws user's paths
void drawPaths(Color col, float thickness) {
    auto& dl = *ImGui::GetWindowDrawList();
    auto col32 = ImGui::ColorConvertFloat4ToU32(col);
    for (auto& path : m_paths) {
        if (path.size() > 0) {
            dl.AddCircleFilled(path[0], 2*thickness, col32,32);
            dl.AddPolyline(&path[0],(int)path.size(),col32,false,thickness);
        }
    }
}
As noted, our Play button calls start_coroutine(playPaths()). A coroutine is a function that can suspend execution by yielding control, and returning to the yield point upon the next frame. It’s an easy way to write “asynchronous” code without threads or other complicated mechanisms. Our coroutine is simple:
/// Coroutine that plays back user's paths
Enumerator playPaths() {
    m_playing = true;
    m_spat.play(m_sig);
    for (auto& path : m_paths) {
        for (auto& t : path) {
            m_target_px = t;
            auto target = pixelToSpatial(t);
            m_spat.setTarget(target.x, target.y);
            // yield control and return at the next frame
            co_yield nullptr;
        }
    }
    m_spat.stop();
    m_playing = false;
}

/// Converts a pixel position to Spatializer position
Vec2 pixelToSpatial(Vec2 in) {
    Vec2 pos;
    pos.x = remap<float>(in.x, m_tactorRect.tl().x, m_tactorRect.br().x, 0., COLS-1);
    pos.y = remap<float>(in.y, m_tactorRect.tl().y, m_tactorRect.br().y, ROWS-1, 0);
    return pos;
}
Next, we can handle the realtime “follow” mode in update:
    ...
    // follow mode, allow user to set target pos with mouse cursor
    else {
        m_target_px = mouse;
        auto target = pixelToSpatial(mouse);
        m_spat.setTarget(target.x, target.y);
    }
    ...
}
Finally, we will write a function to draw the target position, whether set via the “playback” mode or the “follow” mode, and add it to update:
/// Draws the current target position and size
void drawTarget() {
    auto& dl = *ImGui::GetWindowDrawList();
    float rad = m_radius * m_tactorRect.size().x / 2;
    dl.PushClipRect(m_arrayRect.tl(), m_arrayRect.br());
    dl.AddCircleFilled(m_target_px, rad, IM_COL32(255,0,0,64), 32);
    dl.PopClipRect();
}
    ...
    // drag target circle
    if (m_followMode || m_playing)
        drawTarget();
    }
}
The Final Application
All of the code is complete, and we can now build the final application. If you got lost along the way, you can download the finished code from the GitHub repository. Here are our two modes in action: