Unity API
Introduction
In this tutorial, we will learn how to integrate Syntacts into Unity projects. Since Unity uses C# as its scripting language, programming Syntacts in Unity is no different than programming in pure C#. As such, this tutorial will not cover the C# API - refer to the official C# tutorial for that. Instead, we will discuss important details and tips that are specific to Unity.
Requirements
- Unity Engine (2019.3.7.1f or newer)
- latest Syntacts Release
Basic Demo
The Syntacts Release folder contains a Unity demo you may choose to explore. Navigate to unity/SyntactsDemo/Assets/Demo and open Demo.unity. When Unity finishes loading, press the play button in the editor. You should see a ball bouncing on the screen, and a Play Library Signal button in the top-left corner. You should also hear various sound effects. The demo uses Syntacts to generate these sounds in the same way we might use Syntacts to generate haptic vibrations. The only difference is that we have chosen base frequencies in the hearing range. Although this demo is quite simple, three key features are on display:
- Discrete Syntacts Signals - when the ball collides with the floor, a procedural signal is generated and played. The signal is generated in the
BouncyBall.cscomponent, and its parameters can be changed from the Unity editor. - Continuos Syntacts Signals - the ball emits a continuous signal, also defined in
BouncyBall.cs. The pitch of the signal is altered in real time based on the balls’ height above the ground. - Loading Syntacts Signals - the
Play Library Signalloads and plays a signal from the global Syntacts Library when it is pressed. The signal to be loaded is determined from the stringsignalNamefound inside of theLibraryButton.cscomponent. The string can be changed from the editor before or during play.
Getting Started
Adding Syntacts to a new or existing Unity project is simple. From the Release folder, import unity/syntacts.unitypackage into your project either by 1) dragging it into the project window of the editor, or 2) from the editor menu Assets -> Import Package -> Custom Package …. Click Import and the Syntacts assets will be added to the top level of your project:
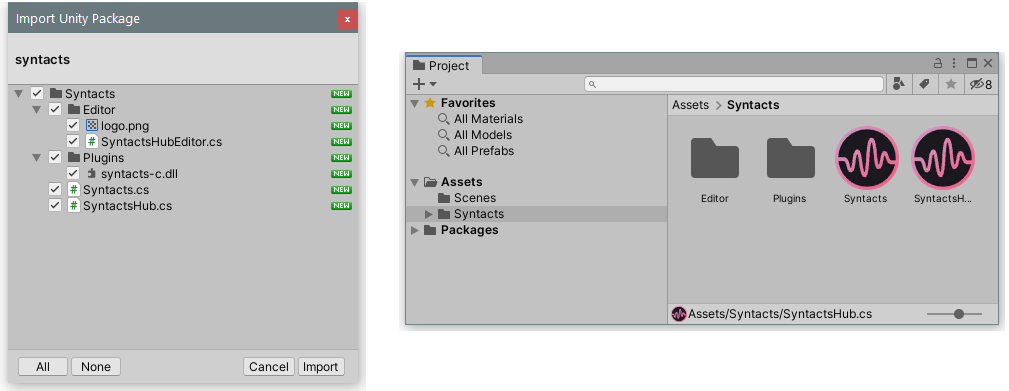
Only two scripts are needed to use Syntacts:
Syntacts.cs- the Syntacts C# binding, containing Syntacts classes, functions, and types (this is the same file found in the C# binding)SyntactsHub.cs- a special Unity component that facilitates opening Syntacts sessions (see below)
The plugin folder contains syntacts_c.dll, the compiled Syntacts dynamic library which is loaded by Unity, and the editor folder contains custom Unity editor code. You can safely ignore both.
SyntactsHub
Although not required, the SyntactsHub component is useful for opening and managing the lifetime of a Syntacts device session. Simply attach this component to an existing or empty GameObject in your scene:

You can use the SyntactsHub to open an audio device in the following modes:
- Default - Opens the system default device. This is usually your computers’ speakers.
- By Index - Opens a device by its index number. You can retrieve device indices from the Available Devices section.
- By Name - Opens a device by its string name under a specified API. The string name must exactly match that shown in the Available Devices section. You should prefer this method over By Index, as device indices can change when other devices are added or removed from your system.
- By API - Opens the default device for a particular API (e.g ASIO, MME, WASAPI, etc.).
- Custom - Opens a device by index with a specified number of channels and sampling frequency. The modes above always open devices at their default sampling frequency (likely 44,100Hz) and maximum output channels.
The device session will be opened in the Awake call of SyntactsHub.cs, and closed in OnApplicationQuit. This means that you should only reference the SyntactsHub from other scripts in between these event function calls (see Unity Order of Execution for more details).
If you choose not to use the SyntactsHub, you can always open and close device sessions from your own scripts. Just be sure to call Session.Dispose before Unity quits, otherwise, you will create a memory leak.
Typical Usage
Assuming you’ve chosen to use SyntactsHub.cs, usage typically looks something like this:
using System.Collections;
using System.Collections.Generic;
using UnityEngine;

// import Syntacts namespace
using Syntacts;

// My Component
public class MyComponent : MonoBehaviour
{
    private SyntactsHub hub;

    void Start()
    {
        // find our SyntactsHub in the Scene
        hub = FindObjectOfType<SyntactsHub>();
    }

    void Update()
    {
        if (Input.GetKeyDown(KeyCode.Space)) {
            // create a new Signal to play
            Signal sig = new Sine(250) * new Envelope(1);
            // play the Signal on channel 0
            hub.session.Play(0,sig);
        }
    }
}
First, we find the SyntactsHub in the scene inside of Start and save a local reference to hub. From here, we can access hubs’ Session object and use it as we would in the standard C# API. A few important notes:
- Prefer initializing in
StartoverAwake. It’s okay to find theSyntactsHubinAwake, but don’t attempt to call any ofSyntactsHub.sessions’ member functions from there. Unity does not guarantee the order of each components’Awakecall, and since the device is opened inside ofSyntactsHub.Awake, it may not be opened beforeMyComponent.Awake. Initializing inStartsolves this sinceStartis always called afterAwake. - If you have multiple
SyntactsHubsin the scene (i.e. you are outputting to multiple devices), you will need to use an approach different fromFindObjectOfType. The simplest fix is to make myhubpublic and assign it from the Unity editor.
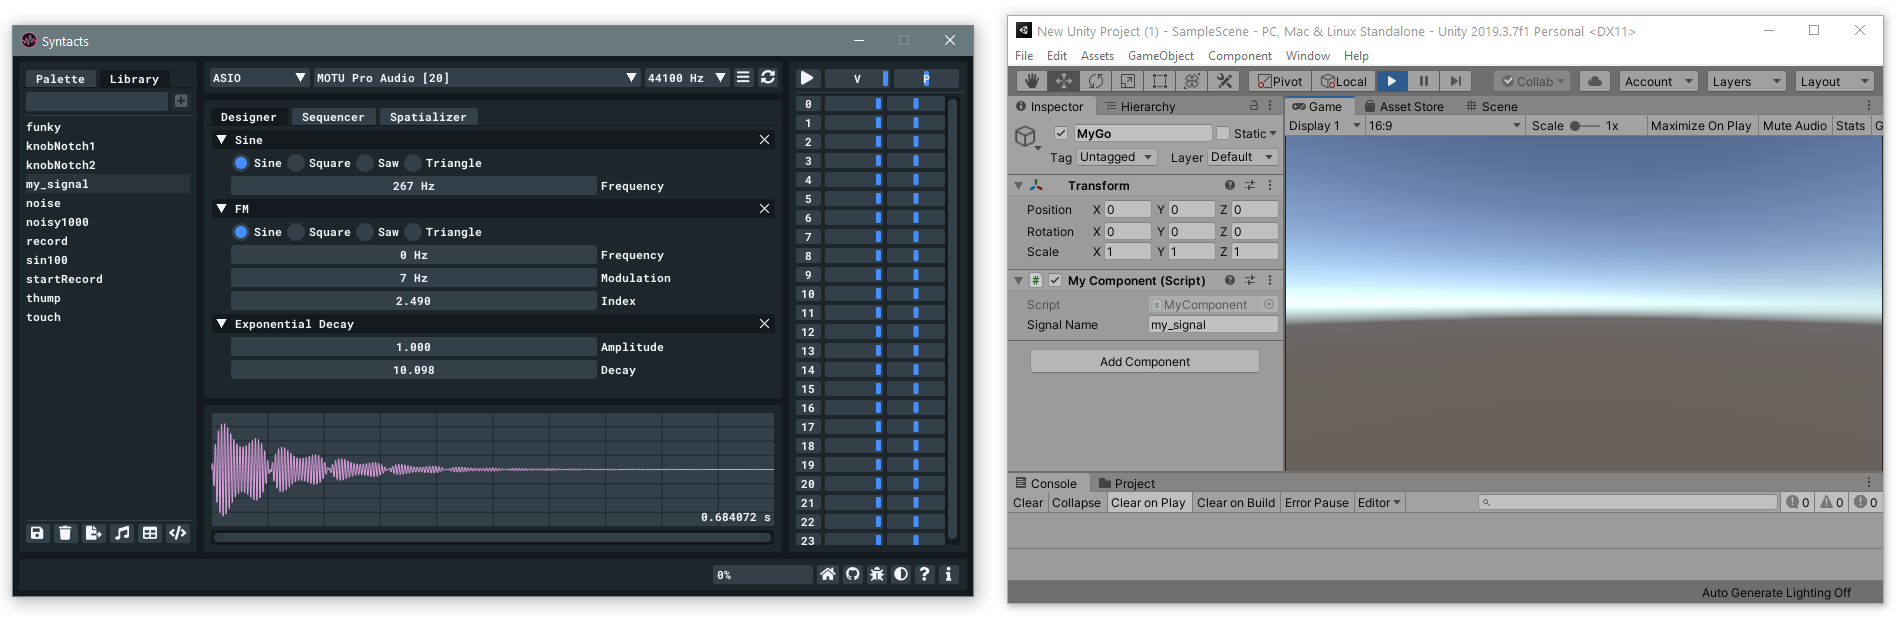
Using Syntacts GUI with Unity
A common requirement of designing haptic effects is needing to tune them online. Instead of repeatedly playing, stopping, and editing your code, you can use Syntacts’ Library features and the GUI to iterate in play mode. First, create a string variable containing the name of the signal to be loaded. You can optionally make this public and assign it from the Unity editor.
public string signalName = "my_signal";

void Update()
{
    if (Input.GetKeyDown(KeyCode.Space)) {
        // attempt to load the Signal and play it
        Signal sig;
        if (Syntacts.Library.LoadSignal(out sig, signalName))
            hub.session.Play(0,sig);
        else
            Debug.LogError("Failed to load Signal " + signalName);
    }
}
Now, when we modify my_signal from the Syntacts GUI and save it, Unity will load the most recent copy without ever having to exit play mode!